

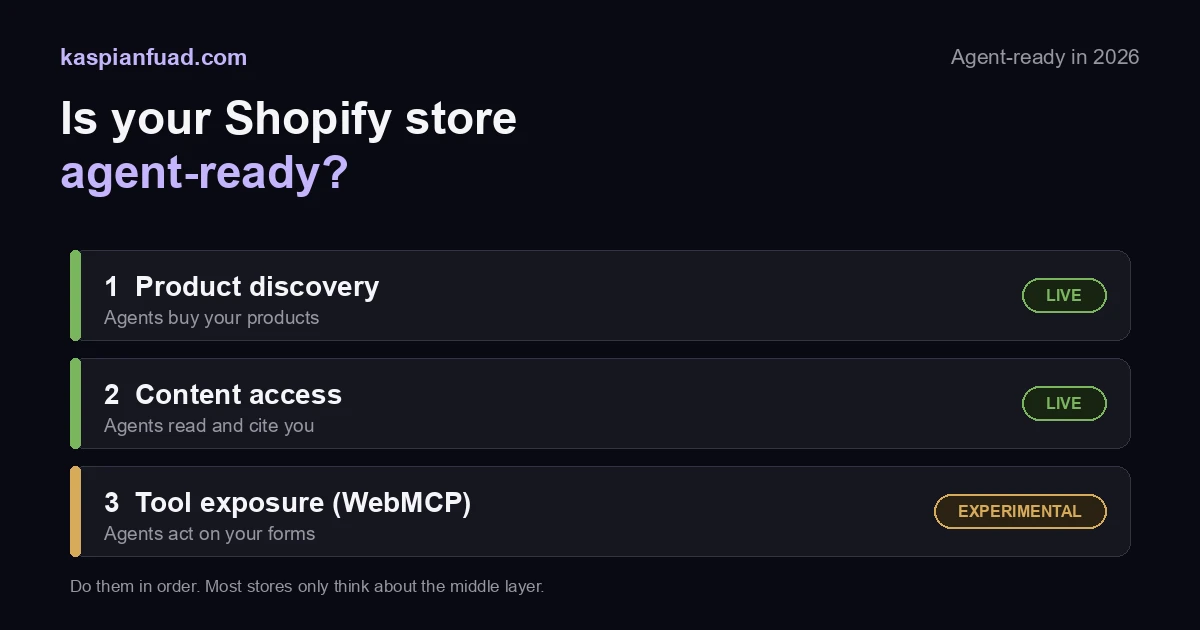
TL;DR: Agent-ready is three layers, and most Shopify stores only think about one. Layer one, product discovery, gets your products recommended and bought by AI shopping agents (Shopify Agentic Storefronts). Layer two, content access, lets AI crawlers read and cite your store (robots.txt, llms.txt, schema). Layer three, tool exposure (WebMCP), lets agents operate your forms. The first two are live and worth doing today. The third is experimental, so keep it to a near-zero-cost declarative annotation. This is the full step-by-step, in priority order, and I ran every step on my own site this week.
AI agents are starting to shop, read, and act on the web instead of just answering questions about it. My own site gets cited by Microsoft Copilot and ChatGPT roughly 1,300 times a quarter, almost all of it for agentic storefronts content. That citation traffic is the tell: the stores that are legible to agents now will be the ones agents recommend later. So the question is not whether to prepare, it is which layer pays off today and in what order.
What does agent-ready mean for a Shopify store in 2026?
It means an agent can do three distinct things with your store: find your products, read your content, and act on your pages. Those are separate technical layers with very different maturity, and you should tackle them in the order below.
| Layer | What it lets an agent do | How you enable it | Status in 2026 |
|---|---|---|---|
| 1. Product discovery | Recommend and buy your products | Shopify Agentic Storefronts + clean structured data | Live, do it now |
| 2. Content access | Read and cite your pages | AI-crawler access, llms.txt, valid schema | Live, do it now |
| 3. Tool exposure | Operate your forms and tools | WebMCP (declarative or JS API) | Experimental, declarative only |
Most “get ready for AI” advice collapses these into one vague pile. They are not one thing. You get almost all the value from the first two, which are mature, and you should treat the third as cheap insurance, not a project.
Step 1: Get your products into agentic storefronts
This is the layer that ends in a sale, and it is opt-out, so if your store is eligible you are probably already in it. The work is confirming you are active and doing the data hygiene that actually earns recommendations. Budget 20 minutes for a small catalog, 1 to 2 hours for 200-plus SKUs.
- Confirm eligibility. In Settings then Plan, confirm a paid plan. In Online Store then Preferences, confirm the storefront password is off. Complete your Terms of service, Privacy, and Return policies in Settings then Policies, and agree to the Agentic Storefronts Supplemental Terms. ChatGPT and Copilot require you to sell to US customers; Google AI Mode and Gemini need a US-based store and are still early access. The full eligibility breakdown is here.
- Make products Shopify Catalog eligible. Agentic checkout runs on Shopify Catalog, not a checkout you configure. Every product needs a title, an image, a price above zero, a public URL, and shipping to the US or Canada, and it must not be unlisted or hidden. Shop Pay is not required, though it speeds checkout for returning buyers.
- Fix Product schema on your top PDPs. Run your top 10 product URLs through the Google Rich Results Test or my Shopify Product Schema Validator. Stores with schema errors get rejected from agent indexing, so clear every error in
Product,Offer,AggregateRating, andBreadcrumbListbefore you rely on it. The four that bite most often are in this breakdown. - Complete the product fields agents read: GTIN (UPC in North America, EAN-13 in the UK and EU), Brand, Product type from Shopify’s standard taxonomy, variant attributes (size, color, material), and at least one structured metafield for category data. Bulk-fix with Matrixify over 100 SKUs.
- Confirm the channel. Open Sales channels then Agentic (
admin.shopify.com/apps/agentic). Because it is opt-out, there is usually no switch to flip: confirm it reads Active with your catalog connected, and control which AI channels are on from here. Shopify provisions your catalog to the Universal Commerce Protocol automatically. - Test it. After a few business days for indexing, ask ChatGPT or Copilot a natural query that should match a hero product (“organic cotton t-shirt under $40 in large”) and confirm your store appears and the PDP loads with a current price.
The complete seven-step version, with the per-channel eligibility detail, is in my agentic storefronts setup guide. This is the layer to spend real time on.
Step 2: Let AI crawlers read and cite your store
Before an agent recommends you, its crawler has to be allowed in. On Shopify you control this in robots.txt.liquid (Online Store, Themes, Edit code, add the template if it does not exist). The mistake I see most is a broad Disallow that quietly blocks the AI bots along with scrapers.
Confirm these user-agents are allowed, not disallowed:
User-agent: GPTBot          # OpenAI training
User-agent: OAI-SearchBot   # ChatGPT Search
User-agent: ChatGPT-User    # ChatGPT live fetch on a user request
User-agent: ClaudeBot       # Anthropic training
User-agent: Claude-SearchBot # Claude search
User-agent: Claude-User     # Claude live fetch on a user request
User-agent: PerplexityBot   # Perplexity
User-agent: Google-Extended # Gemini training/grounding (not AI Overviews)
User-agent: CCBot           # Common Crawl (feeds many models)
Allow: /
Check your live file at yourstore.com/robots.txt and confirm none of those bots sit under a Disallow: /. The full reasoning, including which bots are safe to block, is in how to handle AI crawlers on Shopify. Allowing them is the single highest-impact line change for AI citation, and it takes two minutes.
Step 3: Publish an llms.txt (if your setup allows it)
llms.txt is a Markdown file at your root that tells agents which pages are worth reading. It is not required by any platform, and it is a smaller lever than schema, but it is a free positive signal, and the Lighthouse audit below checks for it.
The Shopify catch: hosted Shopify will not serve a plain-text file at /llms.txt. Your options:
- Cloudflare in front of your domain: a Cloudflare Worker that responds to
/llms.txtwith your content astext/plain. This is how I serve mine. - Hydrogen or Oxygen: add
/llms.txtas a route. - Neither: there is no clean native way today, so skip it and put the time into Step 2 and Step 4.
If you can serve one, keep it under 500 lines: your sitemap URL, your most important collection and product URLs, and a plain-English line on what you sell and who for. Exclude cart, account, and policy pages.
Step 4: Fix your structured data
This is the backbone of both layers, because broken schema is the most common reason a store is technically present but never cited. On a Shopify theme, Product and Organization JSON-LD usually lives in your product and theme layout sections.
- Validate your top PDPs and homepage in the Rich Results Test or my schema validator.
- Ensure every PDP has a complete
Product(name, image, description, sku, brand, gtin), anOffer(price, priceCurrency, availability, url), anAggregateRating, at least oneReview, and aBreadcrumbList. - Ensure your homepage has a valid
Organizationwith your logo andsameAslinks. - Re-check after any theme update or app install, which is the usual cause of schema that silently breaks post-launch.
Clean structured data is the core of generative engine optimization, and it feeds Steps 1 and 2 at the same time.
Step 5: Add WebMCP form annotations (the honest version)
WebMCP is the newest and most over-hyped layer, so here is the honest take. It is a W3C Community Group draft from Microsoft and Google that lets a page expose forms and JavaScript functions as tools an in-browser agent can call.
Two things almost every tutorial gets wrong. First, the API is document.modelContext, not navigator.modelContext; the old name is a deprecated alias that most 2026 posts still teach. Second, and bigger: no mainstream agent consumes WebMCP on live sites yet. Only Chrome and Edge origin trials support it, and Claude, ChatGPT, Perplexity, and Gemini all still read pages by scraping the DOM. Standing up the full registerTool() JavaScript API plus a polyfill, for an audience of zero agents, is exactly the dead-weight script I tell clients to remove.
The move that is worth it is declarative. Annotate an existing form with plain HTML attributes that degrade to nothing where they are not understood:
<form action="/contact" method="POST"
      toolname="contact-store"
      tooldescription="Send the store a question about an order or product">
  <input type="email" name="email"
         toolparamdescription="The sender's email, so the store can reply" required>
  <textarea name="message"
            toolparamdescription="The question, with the order number if relevant" required></textarea>
  <button type="submit">Send</button>
</form>
Leave toolautosubmit off, as I did on my own contact form, so an agent can help a visitor fill the form but the human still clicks submit. That one detail prevents agent-driven spam. Zero dependencies, no measurable bytes, and it satisfies the audit in Step 6.
Step 6: Run the Lighthouse agentic audit
Open Chrome DevTools, go to the Lighthouse panel, and you will see a new category: Agentic browsing, shipped in M150. Check it and run the report.
It has six checks: registered WebMCP tools, forms missing declarative WebMCP, WebMCP schema validity, llms.txt discoverability, accessibility for agents, and layout stability. A Not Applicable on the WebMCP rows just means Lighthouse found no WebMCP on the page, which is the normal state, not an error to panic-fix.
The useful signal is the overlap with things you should already do: a discoverable llms.txt (Step 3), clean accessible markup (agents parse the accessibility tree, so semantic HTML helps them the same way it helps screen readers), and a stable layout that does not shift under a machine reading it. Agent-readiness and good front-end hygiene are mostly the same checklist.
Download the Shopify Agent-Ready Checklist (PDF)
How do I verify my store is agent-ready?
Run these three checks, one per layer, in under ten minutes:
- Product discovery: in Sales channels then Agentic, the channel reads Active and the catalog count matches your active products. Then ask ChatGPT for a product you sell and confirm you appear.
- Content access: load
yourstore.com/robots.txtand confirm no AI bot is under aDisallow: /, then run a top PDP through the Rich Results Test with zero errors. - Tool exposure: run the Lighthouse Agentic browsing audit and confirm your annotated form shows under registered tools and the schema-validity check passes.
Which step matters most?
In order of payoff: product discovery, then content access, then tool exposure. Do not invert it. I see stores chasing WebMCP demos while their product schema is broken and their robots.txt quietly blocks OAI-SearchBot, the agent ChatGPT search cites from. That is backwards. The layer that ends in a sale (Step 1) and the layer that gets you cited (Steps 2 to 4) are both mature and compound today. WebMCP is worth a single declarative annotation as forward prep, and nothing more until a real agent consumes it.
The takeaway
- Enable Shopify Agentic Storefronts and fix your product schema first. It is the only layer that ends in a purchase.
- Allow the AI crawlers in
robots.txt.liquid, then keep your structured data valid. That is what gets you cited. - Publish an llms.txt only if you have Cloudflare or Hydrogen. It is a small, optional signal.
- Add one declarative WebMCP annotation to your main form, and leave
toolautosubmitoff so a human still submits. - Skip the full WebMCP JavaScript API and polyfill until a mainstream agent actually calls it. Today that audience is zero.
I made my own Shopify-focused site agent-ready across all three layers this week. If you want your store audited for agent-readiness and AI citation, my 30-minute store diagnostic is free.